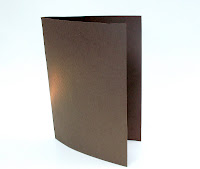
 Here's a quick and easy how-to for making your own Father's Day card. Have your kids help you for a fun craft break! Once you have all of your materials gathered, this quick-and-easy card can be assembled in about 15 minutes. All of your materials can be purchased at the local craft store, Walmart or the $1 store.
You will need the following:
~2 pieces of 8 1/2" x 11" or 12" x 12 " plain colored cardstock (I used brown and orange).
~An 8 1/2 x 11" or 12" x 12" piece of patterned cardstock, look for one with your preferred theme. I chose a Father's Day embossed print).
~Adhesive mounting squares, photo safe glue-stick or double-sided tape.
~A paper trimmer or a ruler and scissors will do fine.
~A pencil (with a white eraser)
~A photo of your child or children that can be cropped.
~ Optional - decorative edge scissors (I used stamped edge)
 1st, choose one piece of plain cardstock. With ruler and pencil, measure and mark off a 10" wide x 7" long rectangle. Use scissors or paper cutter to cut out the rectangle. Fold the rectangle in half, making a 5" x 7" vertical card.
2nd, cut 3 rectangles from the patterned paper:
a. 2" wide x 6 3/4" long
b. 2 7/8" x 3 3/8" long
c. 2 1/4" wide x 2 3/4" long
1 from the other colored cardstock:
d. 2 1/4" x 3 1/4"
and 1 from the photo, e. 1 3/4" x 2 1/4"(draw an outline of the rectangle around the area of the picture you want to keep). If you have decorative scissors, use them to trim around the edges of all the rectangles except d. and e. (as shown in the first photo).
 ~Take rectangle a. and apply adhesive to the back side all around the edges. Turn over and place this along the left side of the card.
~Take rectangle d., apply adhesive to the back and stick it to rectangle b.
~Take the photo (e.), apply adhesive to the back and stick it to rectangle c.
 Apply adhesive to the backs of rectangles b. and c. and place them as shown in the photo to the left.
 Finally, if you desire a little color on the inside of your card, cut a rectangle out of the left-over colored cardstock, 4 1/2" x 6". Put adhesive on the back and adhere it to the inside of the card. Trim with decorative scissors before adhering if desired.
Last but not least, don't forget to add your personalized message to Dad!

2 comments:
Great job with the tutorial! I like having measurements.
wonderful and fun idea! Thanks for sharing
Post a Comment